Getting a new garage door installed is one of those home improvement projects that most people only do once or twice in their lives. Unlike painting a room or replacing a faucet, it is not something you have a reference point for. When the installer says the job will take four hours, you have no idea if that is fast, slow, or about right. When they show up with a truck full of panels and hardware, you are not sure what the process looks like or what you should be watching for.
That uncertainty makes a lot of homeowners uneasy, and for good reason. A garage door is a major purchase -- typically $1,000 to $3,000 or more with installation -- and a bad installation can cause problems that follow you for years. This is a step-by-step walkthrough of what a professional garage door installation actually looks like in the Charlotte area, from the initial quote to the final walkthrough, so you know exactly what to expect and can tell the difference between a crew that knows what they are doing and one that does not.
Before Installation Day: The Estimate and Measurement Visit
A good installation starts well before the crew shows up. It starts with a measurement visit, which is separate from the installation itself.
A qualified installer will come to your home, measure the garage opening, check the headroom (the space between the top of the opening and the ceiling), measure the side room (the space beside the opening where the tracks mount), and check the condition of the existing framing. These measurements determine which doors will fit your opening and whether any modifications are needed.
During this visit, the installer should also check:
- The condition of the existing framing. If the header board above the opening is sagging, cracked, or rotted, it needs to be repaired before a new door goes in. This is more common in older homes in Charlotte neighborhoods like Plaza Midwood, Dilworth, and Elizabeth, where the original garage framing may be 40 to 60 years old.
- Whether the floor is level. If the garage floor has settled unevenly over the years, the bottom seal of the new door may not make full contact across the opening. The installer needs to know this ahead of time so they can plan accordingly.
- The electrical setup. The opener needs a grounded outlet within reach of the mounting location. Most Charlotte homes have this, but some older homes or detached garages may need an electrician to add one before installation day.
- HOA requirements. If you live in an HOA community -- and a large percentage of homes in Ballantyne, Weddington, Mooresville, and the Lake Norman corridor do -- the installer should be aware of any style, color, or material restrictions that apply to your neighborhood. Some HOAs require architectural approval before a garage door replacement.
After the measurement visit, you will receive a quote that includes the door itself, the hardware, the opener (if you are replacing that too), installation labor, and removal and disposal of the old door. Most Charlotte-area installers include old door removal in the price. Ask about it explicitly if the quote does not mention it.
Lead Time: How Long Until Installation Day
Once you approve the quote and place the order, the door has to be ordered and delivered. Lead times vary depending on what you choose:
- Standard stock doors (basic steel raised-panel designs in common sizes and colors) are often available within one to two weeks. These are the bread-and-butter doors that most Charlotte installers keep in their warehouse or can get from a regional distributor quickly.
- Semi-custom doors (less common colors, window configurations, or hardware upgrades) typically take two to four weeks.
- Fully custom doors (wood carriage doors, unusual sizes, specialty materials) can take four to eight weeks or longer depending on the manufacturer. Brands like Amarr, Clopay, and C.H.I. all have custom programs with different lead times.
Spring and fall are the busiest seasons for garage door installation in Charlotte. After severe storm seasons or major hail events, lead times can stretch because demand spikes across the whole metro area. If your project is not urgent, scheduling during the winter months (December through February) often gets you shorter wait times.
Installation Day: What Happens Step by Step
On installation day, the crew will typically arrive in a box truck or trailer with the new door panels, tracks, hardware, springs, and opener (if included). Here is what happens in order.
Step 1: Removing the Old Door
The first thing the crew does is disconnect and remove the old door. This starts with disconnecting the opener from the door, then releasing the tension on the existing springs. Spring tension release is the most dangerous part of any garage door job. A proper crew uses winding bars and follows a specific procedure. If you see someone removing springs with a screwdriver or pliers, that is a red flag. More detail on spring safety is in our springs and cables safety guide.
After the springs are de-tensioned, the crew removes the old panels one at a time from top to bottom, followed by the tracks, brackets, and any old hardware. The old door sections are loaded onto the truck for disposal. A good crew cleans up any debris and removes old weatherstripping from the jamb.
Step 2: Preparing the Opening
With the old door out, the crew inspects the opening and makes any necessary adjustments. This might include:
- Shimming or adjusting the jamb so it is plumb and square
- Replacing damaged or rotted wood in the header or jamb
- Adding blocking for track mounting brackets if the existing framing does not provide solid attachment points
- Marking the track layout on the ceiling based on the new door's specifications
This preparation step takes anywhere from 15 minutes on a well-framed opening to an hour or more if there are framing issues. It is one of the most important parts of the installation because everything that follows depends on the opening being square and solid. A door installed on a crooked opening will never operate correctly, no matter how good the door is.
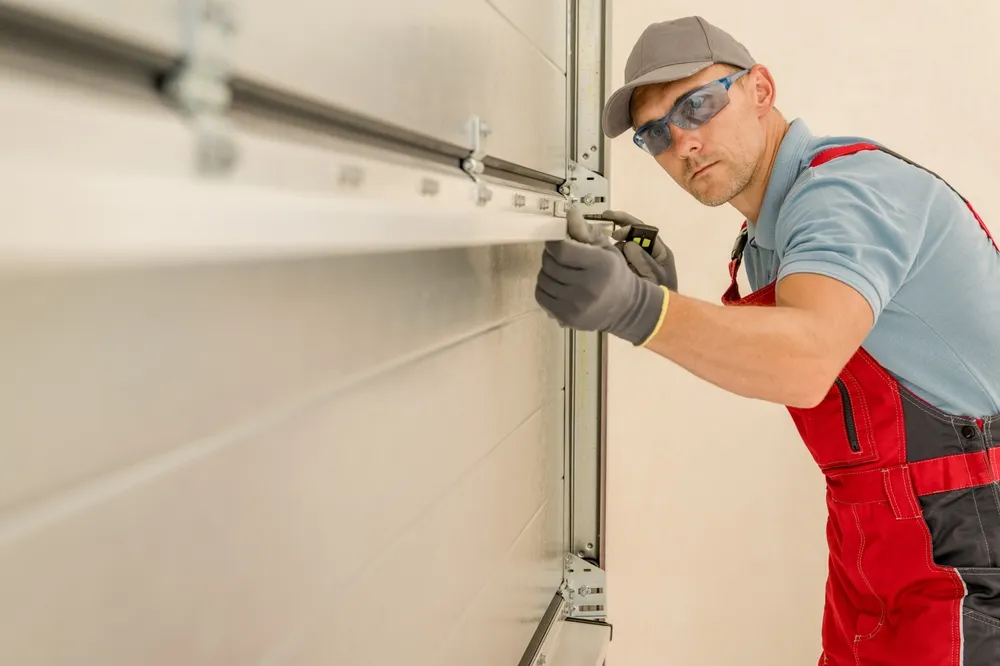
Step 3: Installing the New Door Panels
New garage door panels are installed from the bottom up. The bottom panel goes in first, set on the floor with the bottom seal attached. Each subsequent panel is stacked on top, connected to the panel below with hinges, and secured in the vertical tracks on each side. Rollers are inserted into the hinges and track as each panel is added.
A standard two-car garage door has four or five horizontal sections. Each section weighs 40 to 80 pounds depending on the material and insulation, so this is a two-person job. The panels need to be handled carefully to avoid dents or scratches during installation. If you see the crew dragging panels across the driveway or leaning them against rough surfaces, speak up.
Step 4: Installing the Tracks and Hardware
With all the panels in place, the crew installs the horizontal tracks that run along the ceiling, the curved sections that connect the vertical and horizontal tracks, and the rear track hangers that support the weight of the door when it is open. The track alignment is critical. If the tracks are not parallel, level, and properly spaced, the door will bind, rub, or operate unevenly.
Step 5: Installing the Springs
The torsion springs are mounted on a shaft above the door opening. The installer selects springs that are rated for the specific weight of your new door. This is not a one-size-fits-all situation. A heavier insulated door needs different springs than a lighter non-insulated door. If the installer uses springs from the old door on the new door without checking the weight match, that is a problem.
Once the springs are mounted, the installer winds them to the correct tension using winding bars. Proper tension means the door should stay in place when lifted to waist height and released. Too much tension and the door will fly up. Too little and it will be heavy and strain the opener.
Step 6: Installing the Opener
If you are getting a new garage door opener, the crew installs it after the door and springs are in place. The opener rail is assembled and mounted to the header bracket above the door, and the motor unit is mounted to the ceiling. The crew then attaches the opener arm to the door bracket, connects the power, programs the remotes, and sets the travel limits so the door opens and closes to the correct positions.
If you are keeping your existing opener, the installer will reconnect it to the new door and adjust the force and travel settings. Different doors have different weights and travel distances, so these settings almost always need to be recalibrated when a new door goes in.
Step 7: Weatherstripping and Finishing
The final construction step is installing the weatherstripping. This includes the bottom seal on the door itself and the side and top seals on the door frame. Good weatherstripping is especially important in Charlotte's climate, where 43-plus inches of annual rain and high summer humidity mean water and moisture are constant threats. If the installer skips or rushes the weatherstripping, you will be dealing with water, bugs, and drafts for the life of the door.
How Long the Whole Thing Takes
A standard single-car garage door installation (removing the old door and installing a new one with opener) takes about three to four hours for an experienced two-person crew. A two-car door takes four to five hours. A two-car garage with two single doors rather than one double door takes five to six hours because there are two complete systems to install.
Custom doors, oversized doors, or installations that require framing repairs can take a full day. If the crew is also running new electrical for the opener, that adds time depending on the complexity.
Weather can affect the schedule too. Charlotte's afternoon summer thunderstorms can shut down an installation that is in progress, especially during the panel installation phase when the garage opening is exposed. Most crews check the forecast and plan accordingly, but delays happen.
The Final Walkthrough: What to Check
A professional installer will walk you through the completed installation before they leave. During this walkthrough, pay attention to these things:
- Watch the door operate several times. It should move smoothly from full open to full close without jerking, hesitating, or scraping. Listen for unusual noises. A new door should be quiet.
- Check the balance. Ask the installer to disconnect the opener and demonstrate the manual balance. The door should stay roughly in place when lifted to waist height. If it drops or shoots up, the spring tension needs adjustment.
- Test the auto-reverse. Place an object on the floor in the path of the door and close it with the opener. The door should contact the object and immediately reverse. This is a federal safety requirement.
- Test the photo eye sensors. Close the door with the opener, then wave your foot through the sensor beam while the door is closing. It should stop and reverse immediately.
- Inspect the weatherstripping. Walk around the inside of the closed door and check that the seals are making contact on all four sides. There should be no visible daylight or gaps.
- Check for cosmetic damage. Look at the panels in good light for any dents, scratches, or blemishes that may have occurred during installation. It is much easier to address these on installation day than a week later.
- Get the paperwork. The installer should provide the manufacturer's warranty information, any labor warranty they offer, the opener manual and remotes, and a receipt. Keep all of this. You will need the warranty documents down the road, and knowing the specifics of your garage door warranty can save you money later.
Red Flags During Installation
Most Charlotte garage door companies do good work. But there are a few warning signs that something is off:
- One-person crew for a full installation. Garage door installation is a two-person job. A single installer rushing through the work is more likely to make mistakes and take shortcuts.
- No measurement visit before installation day. If the installer shows up on installation day having never measured your opening, there is a real chance the door will not fit correctly.
- Reusing old springs on a different-weight door. If the new door is a different weight than the old one (which it almost certainly is if you changed materials or insulation levels), the springs need to match the new weight.
- Skipping the safety tests. If the installer does not test the auto-reverse and photo eye sensors, or does not offer a walkthrough, ask for it. These are basic professional steps.
- No cleanup. The old door, packaging, and hardware should leave with the crew. If they dump it in your driveway and leave, that is not a professional operation.
After Installation: First-Week Checks
During the first week with your new door, run it through a few cycles per day and pay attention to how it sounds and feels. New doors sometimes need a minor adjustment after the initial break-in period. The springs may settle slightly, or the weatherstripping may compress and need the travel limit adjusted. Most installers will come back within the first 30 days for a free adjustment if needed. Ask about this before they leave on installation day.
Also take note of the door's operation during different weather conditions. Charlotte's temperature swings, especially during spring and fall when mornings can be in the 40s and afternoons in the 70s, can affect how the door sits in the opening as the metal expands and contracts. These are minor things, but if anything seems off, calling the installer early is better than waiting.
Getting a new garage door installed does not have to be stressful. When the company measures properly, orders the right door, and sends a competent crew, the whole process is smooth and finished in a day. If you are ready to get started, call to connect with a professional Charlotte garage door installer who will walk you through every step.