You press the button to close your garage door, the motor starts running, and then the door reverses back up. Or it does not move at all and the light on the opener blinks a few times. You look down at the bottom of the door frame and notice one of the small sensor lights is off, blinking, or a different color than the other one. This is probably the most common garage door problem Charlotte homeowners deal with, and you can often fix it yourself in a few minutes. Here is how safety sensors work, what goes wrong, and how to troubleshoot the blinking light.
How Garage Door Safety Sensors Work
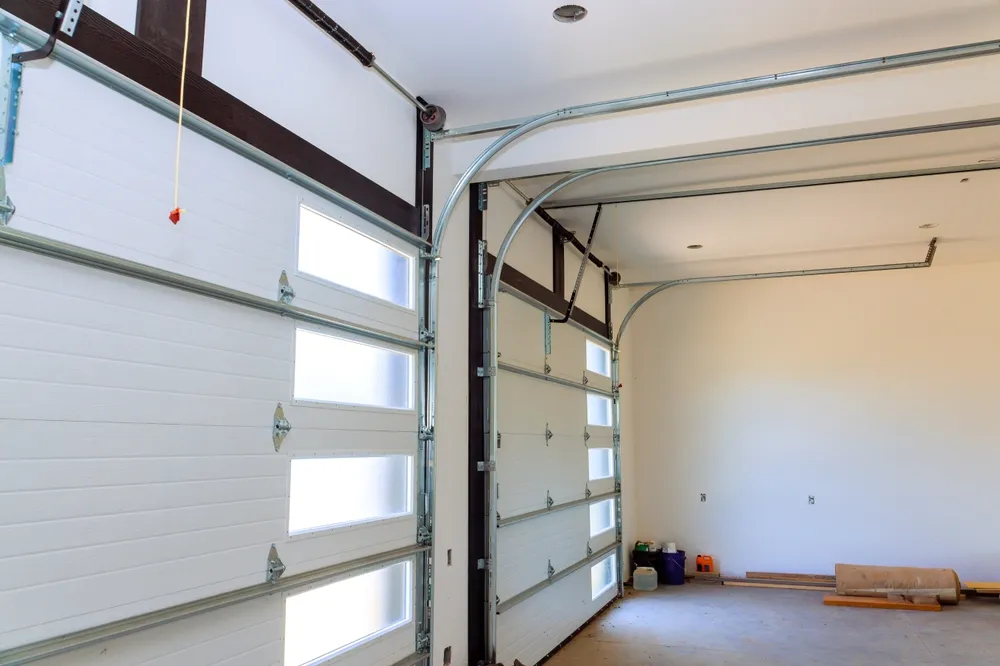
Every garage door opener sold in the United States since 1993 is required by federal law to have safety reversing sensors. These are the two small devices mounted near the floor on either side of the garage door opening, about four to six inches off the ground. One sensor sends an invisible infrared beam across the door opening. The other sensor receives that beam. As long as the beam is unbroken, the opener knows the path is clear and the door can close. If something breaks the beam -- a person, a pet, a bicycle, anything -- the opener reverses the door or refuses to close it.
The sending sensor and the receiving sensor have indicator lights, usually LEDs, that tell you their status. On most opener brands, the sending sensor has a steady light (often amber or yellow) that stays on as long as the sensor has power. The receiving sensor has a light (often green) that stays on when it is properly aligned and receiving the beam from the sending sensor. If that receiving sensor light is off or blinking, the beam is not getting through, and the opener will not close the door.
These sensors are a critical safety feature for families with children and pets. They prevent the door from closing on something or someone in its path. So while a malfunctioning sensor is frustrating when you are trying to leave for work, the system is doing exactly what it is designed to do: refusing to close the door when it cannot confirm the path is safe.
What the Blinking Light Means by Brand
Different garage door opener brands use their indicator lights in slightly different ways. Here is what to look for on the most common brands found in Charlotte-area homes.
LiftMaster and Chamberlain
LiftMaster and Chamberlain are made by the same company and use the same sensor system. The sending sensor has an amber LED. The receiving sensor has a green LED. If the green LED is off or blinking, the sensors are not aligned or the beam is blocked. If the amber LED is off, the sending sensor has a power issue. The opener light on the motor unit will blink ten times when a sensor problem prevents the door from closing.
Genie
Genie openers use a pair of sensors with red indicator lights. Both sensors should show a steady red light when properly aligned and functioning. If either light is off or blinking, the sensors are misaligned or obstructed. On newer Genie models, the opener LED will flash a specific number of times to indicate different error conditions: four flashes for a sensor issue, two flashes for a wiring problem.
Craftsman
Older Craftsman openers (made by Chamberlain) use the same amber/green sensor system as LiftMaster. The green light on the receiving sensor should be steady. Blinking green means alignment is off. No light on either sensor means a wiring or power issue.
Linear and Wayne Dalton Openers
Linear-brand openers, which were common in Charlotte homes built in the 2000s and early 2010s, use sensors with single LED indicators. A steady light means everything is working. A blinking light or no light means an alignment or wiring problem. Wayne Dalton openers follow a similar pattern.
The Six Most Common Sensor Problems
Safety sensors are simple devices, but several things can go wrong with them. Here are the problems we see most often in the Charlotte area, in order of how frequently they come up.
1. Misalignment
This is the cause of sensor problems about half the time. The sending and receiving sensors need to be pointed directly at each other for the infrared beam to connect. If either sensor gets bumped -- by a broom, a bicycle, a kid, a lawn mower, anything -- it shifts just enough to break the beam. The sensors are mounted on thin metal brackets that do not take much force to move.
Misalignment is especially common in busy garages where the area near the sensors gets a lot of foot and vehicle traffic. Families in Charlotte neighborhoods like South End, University City, and Ballantyne who use their garages as primary entry points walk past these sensors multiple times a day. It does not take much of a bump to knock one out of alignment.
2. Dirty or Obstructed Lenses
The sensor lenses are small, usually about the size of a dime, and they sit close to the garage floor where they collect dust, dirt, spiderwebs, and debris. A thin layer of dust on the lens can weaken the infrared signal enough to cause intermittent problems. A spiderweb across the lens can block it entirely. Charlotte's humid climate is friendly to spiders, and the small warm space behind a garage door sensor is exactly the kind of spot they like to build webs.
This is also a seasonal issue. In fall, leaves blow into the garage and can settle against the sensors. In spring, pollen -- and Charlotte produces truly impressive amounts of pollen from late March through early May -- coats everything in the garage with a fine yellow-green film, including the sensor lenses.
3. Sun Interference
This one catches a lot of homeowners off guard. The safety sensors use infrared light, and the sun produces infrared light too. When direct sunlight hits the receiving sensor at certain times of day, the sensor gets overwhelmed by the sun's infrared energy and can no longer distinguish the beam from the sending sensor. The result is a sensor that works fine most of the day but fails during specific afternoon hours when the sun angle is just right.
Sun interference is most common on garages that face west or southwest, where the afternoon sun shines directly into the garage opening. In Charlotte, this is a particularly common complaint from May through August when the sun is high and the long summer days mean extended afternoon sun exposure. Homes on east-west streets throughout the metro area deal with this regularly.
4. Wiring Problems
The sensors connect to the opener motor unit with thin two-conductor wires that run along the walls and ceiling of the garage. These wires can be damaged by staples that were driven too deep during installation, by rodent chewing, by vibration loosening a connection at the sensor or at the opener, or by corrosion at the wire terminals.
Wiring problems cause symptoms that look like alignment issues -- the sensor light is off or blinking -- but no amount of adjusting the sensor position will fix a wiring problem. If you have re-aligned and cleaned the sensors and the light still will not stay steady, wiring is the likely culprit.
5. Moisture and Corrosion
The sensor terminals and wire connections are exposed to the garage environment, which in Charlotte means heat, humidity, and occasional moisture from rain blowing in under the door. Over time, the wire connections can corrode, increasing electrical resistance and weakening the signal. This is more common in garages that are not well sealed, where rainwater makes it past the bottom seal during heavy storms. Charlotte averages about 43 inches of rain per year, and the driving rain from summer thunderstorms can push water into garages that are otherwise dry.
6. Failed Sensor
Safety sensors do not last forever. After 10 to 15 years of daily use and exposure to temperature swings from the low 20s in a January cold snap to over 100 degrees inside a closed garage in July, the LED or the photoelectric eye can fail. When a sensor fails internally, no amount of cleaning or re-aligning will fix it. The sensor needs to be replaced.
Step-by-Step Troubleshooting
Before calling a repair company, work through these steps in order. They will fix the problem about 70 percent of the time.
Step 1: Look at the sensor lights. Go to the garage door opening and look at both sensors. Note which lights are on, off, or blinking. If both lights are off, the issue is likely a power or wiring problem. If one light is steady and the other is off or blinking, alignment is the most likely cause.
Step 2: Check for obstructions. Look at the path between the two sensors at floor level. Move anything that might be breaking the beam: a box, a shoe, a garden hose, a trash can. Even something that partially blocks the beam can cause problems.
Step 3: Clean the sensor lenses. Use a soft dry cloth or a paper towel to wipe both sensor lenses. Do not use glass cleaner or any liquid -- just a dry wipe to remove dust, pollen, and spider webs. While you are down there, clear away any cobwebs around the sensors.
Step 4: Re-align the sensors. This is the most common fix. Loosen the wing nut or screw that holds the sensor bracket to the mounting bracket. Gently adjust the sensor until the indicator light comes on steady. The receiving sensor (usually the green light) is the one that matters most -- it needs to be aimed directly at the sending sensor. Some people find it helpful to tie a string between the two sensors to establish the sight line, then adjust until both sensors point along that string.
Step 5: Check the wiring connections. At each sensor, there are two wires connected to screw terminals or push-in connectors. Make sure the wires are firmly attached and not corroded. At the opener motor unit, the sensor wires connect to terminals usually labeled "white" and "white/black" or with a sensor icon. Make sure those connections are tight too.
Step 6: Test the door. After cleaning and re-aligning, test the door by pressing the wall button. The door should close completely without reversing. Test the sensors by waving your hand through the beam while the door is closing -- it should reverse immediately. If the door still will not close, or if the sensor light will not stay steady no matter what you do, the problem is beyond basic troubleshooting.
The Sun Interference Fix
If your sensors work fine in the morning but fail in the afternoon when the sun is shining into the garage, you have a sun interference problem. There are a few ways to deal with it:
- Shade the sensor. A small piece of cardboard tube -- like a toilet paper roll or a section of PVC pipe -- placed around the receiving sensor acts as a sun shade. It blocks the direct sunlight while still allowing the infrared beam from the sending sensor to reach the photoelectric eye. This is the cheapest and easiest fix.
- Swap the sensor positions. If only one side of the door gets direct sun, moving the receiving sensor to the shaded side can solve the problem. The sending sensor is less affected by sunlight because it is producing a signal, not receiving one.
- Replace with newer sensors. Modern sensors have better sun filtering than sensors made 10 or 15 years ago. If your sensors are old and sun interference is a recurring problem, a new pair of sensors may handle the sunlight better.
When to Call a Professional
Call a professional if:
- You have cleaned and re-aligned the sensors and the light still will not stay steady
- Both sensor lights are off and the wiring looks intact
- The sensor light comes on when you hold the sensor in your hand but goes off when you mount it back on the bracket (this usually means the bracket or the sensor mounting hole is damaged)
- The door will not open or close at all, not just fail to close
- You see damaged, frayed, or chewed wires
- You have replaced the sensors and the problem persists, which could indicate an issue with the opener logic board
A technician can test the sensors with a multimeter, check the wiring continuity, and diagnose problems with the opener's logic board that are not visible from the outside.
What Does Sensor Replacement Cost?
If the sensors need to be replaced, the parts cost $30 to $75 for a pair of aftermarket sensors, or $50 to $100 for OEM sensors from the opener manufacturer. Installation typically adds $50 to $100 for labor, so the total cost for sensor replacement is $80 to $200 in the Charlotte area.
It is almost always worth replacing both sensors at the same time, even if only one has failed. If one sensor has worn out after 10 or 12 years, the other one is likely close behind. Replacing both at once saves a second service call down the road.
For newer smart openers with integrated sensor systems, replacement sensors may be specific to the opener model and cost more than universal aftermarket options. Check with the opener manufacturer or a local dealer for compatibility.
Do Not Bypass Your Safety Sensors
We need to mention this because it comes up. Some homeowners, frustrated by persistent sensor problems, look for ways to bypass the safety sensors so the door will close regardless. You can find videos online showing how to do this. Do not do it. The sensors exist to prevent the door from closing on a person, a child, or a pet. A garage door closing with full force can cause serious injury or death. A $100 sensor replacement is not worth skipping.
If you need to close the door temporarily while the sensors are malfunctioning, you can hold down the wall-mounted button continuously. On most openers, holding the button (rather than pressing and releasing) will close the door even with a sensor fault. The door will not auto-reverse from the sensor signal while you are holding the button, but it will still reverse if it contacts an obstruction. This is a built-in feature designed for exactly this situation, but it should only be used as a short-term workaround until the sensors are fixed.
Sensor problems you cannot sort out on your own? Call to reach a Charlotte garage door repair technician who can test the sensors, replace them if needed, and get your door closing right again.